Figures
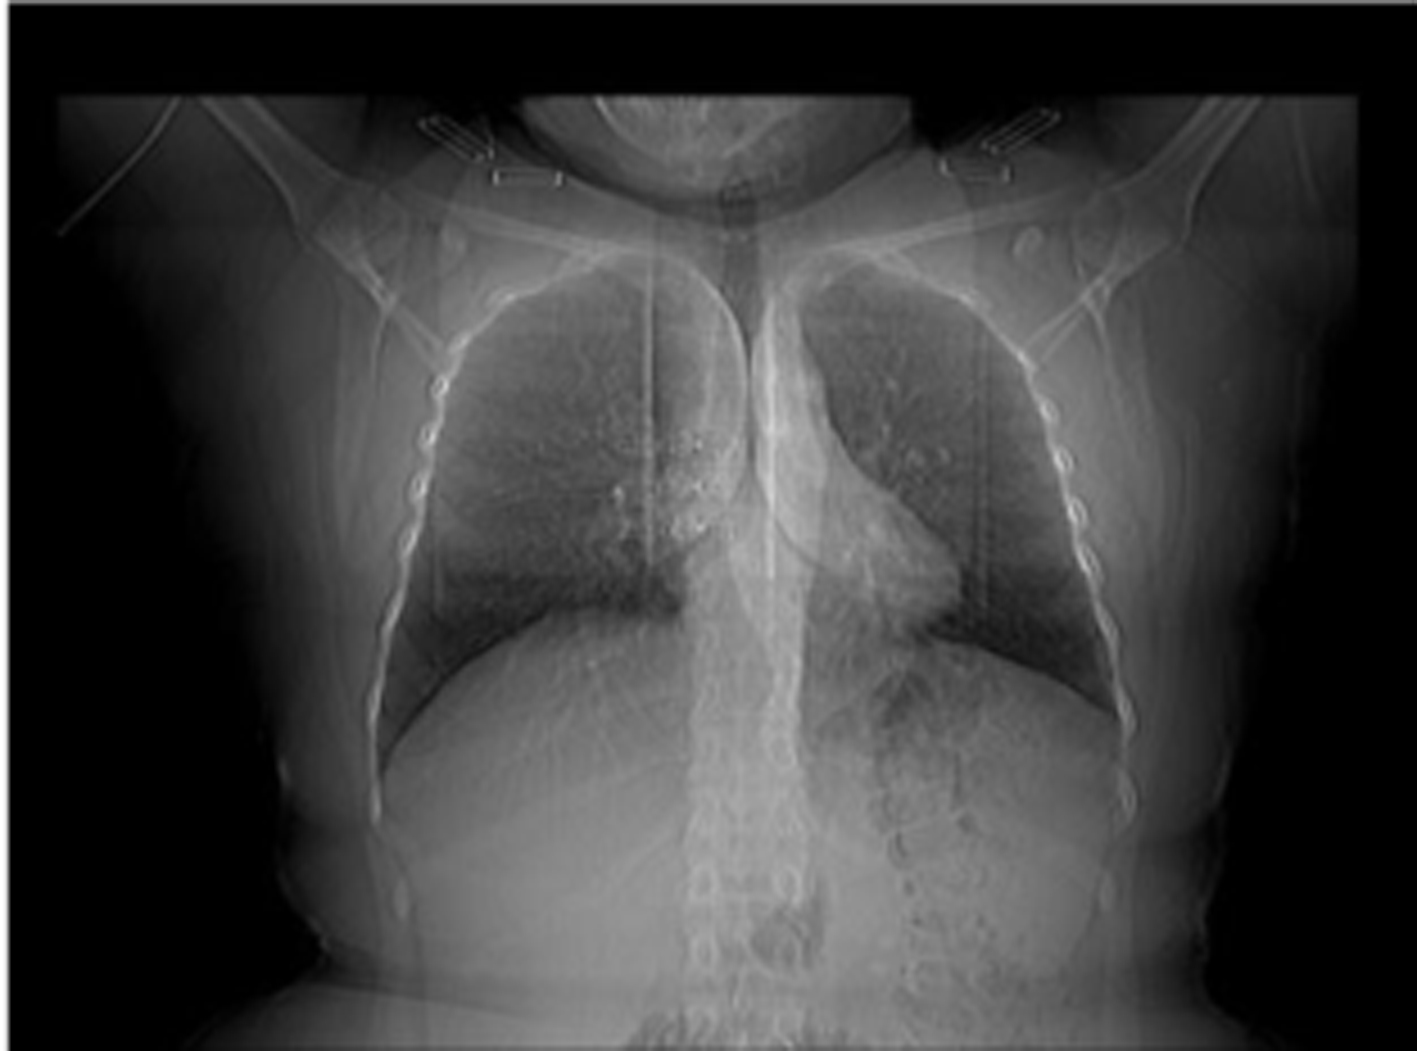
Figure 1. Scanogram of case 1.
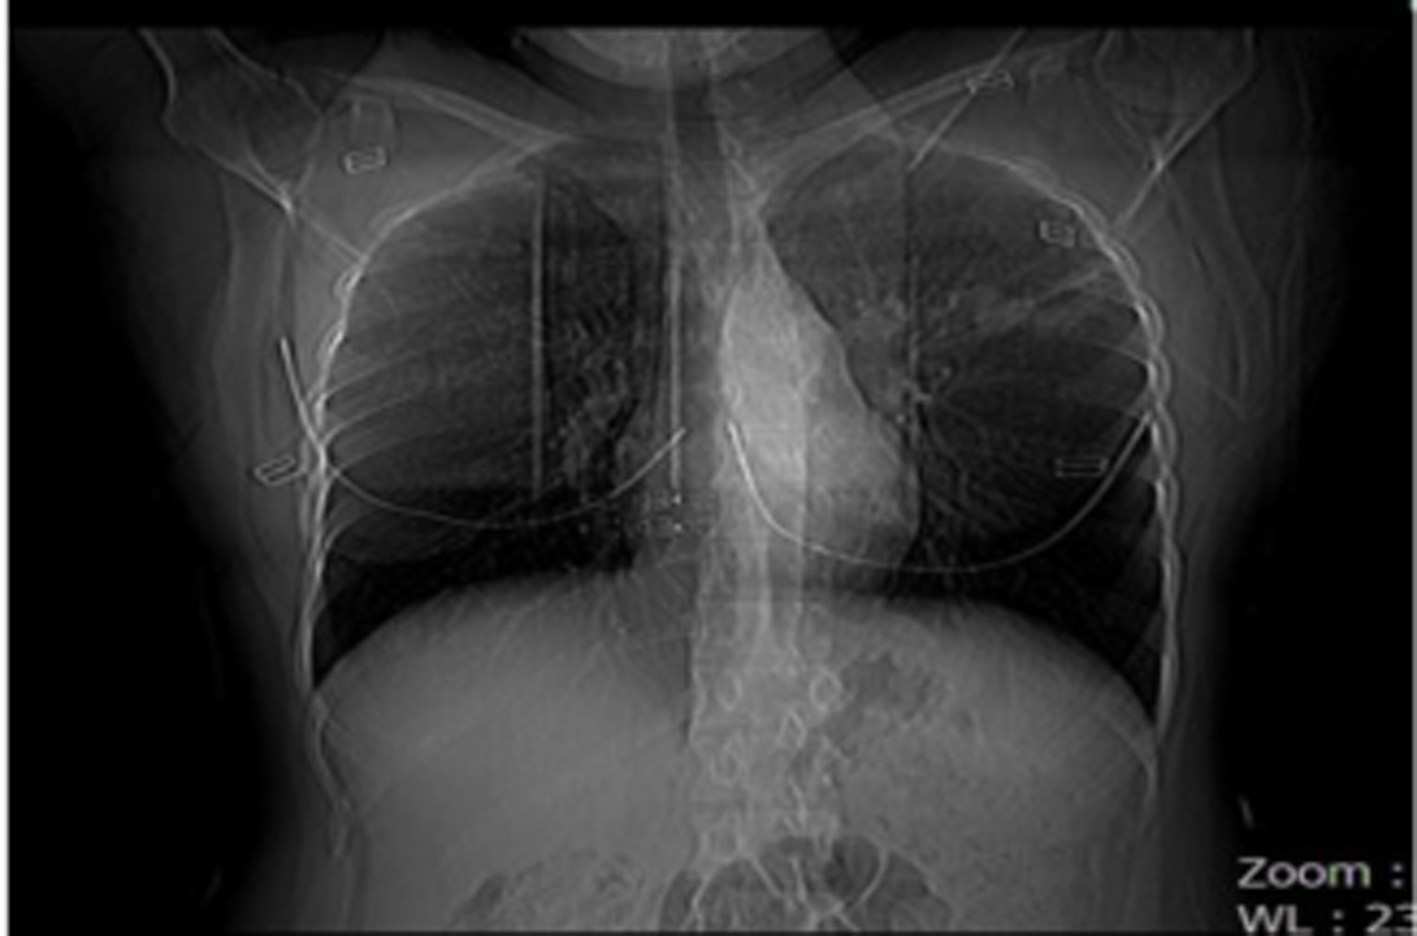
Figure 2. Scanogram of case 2.
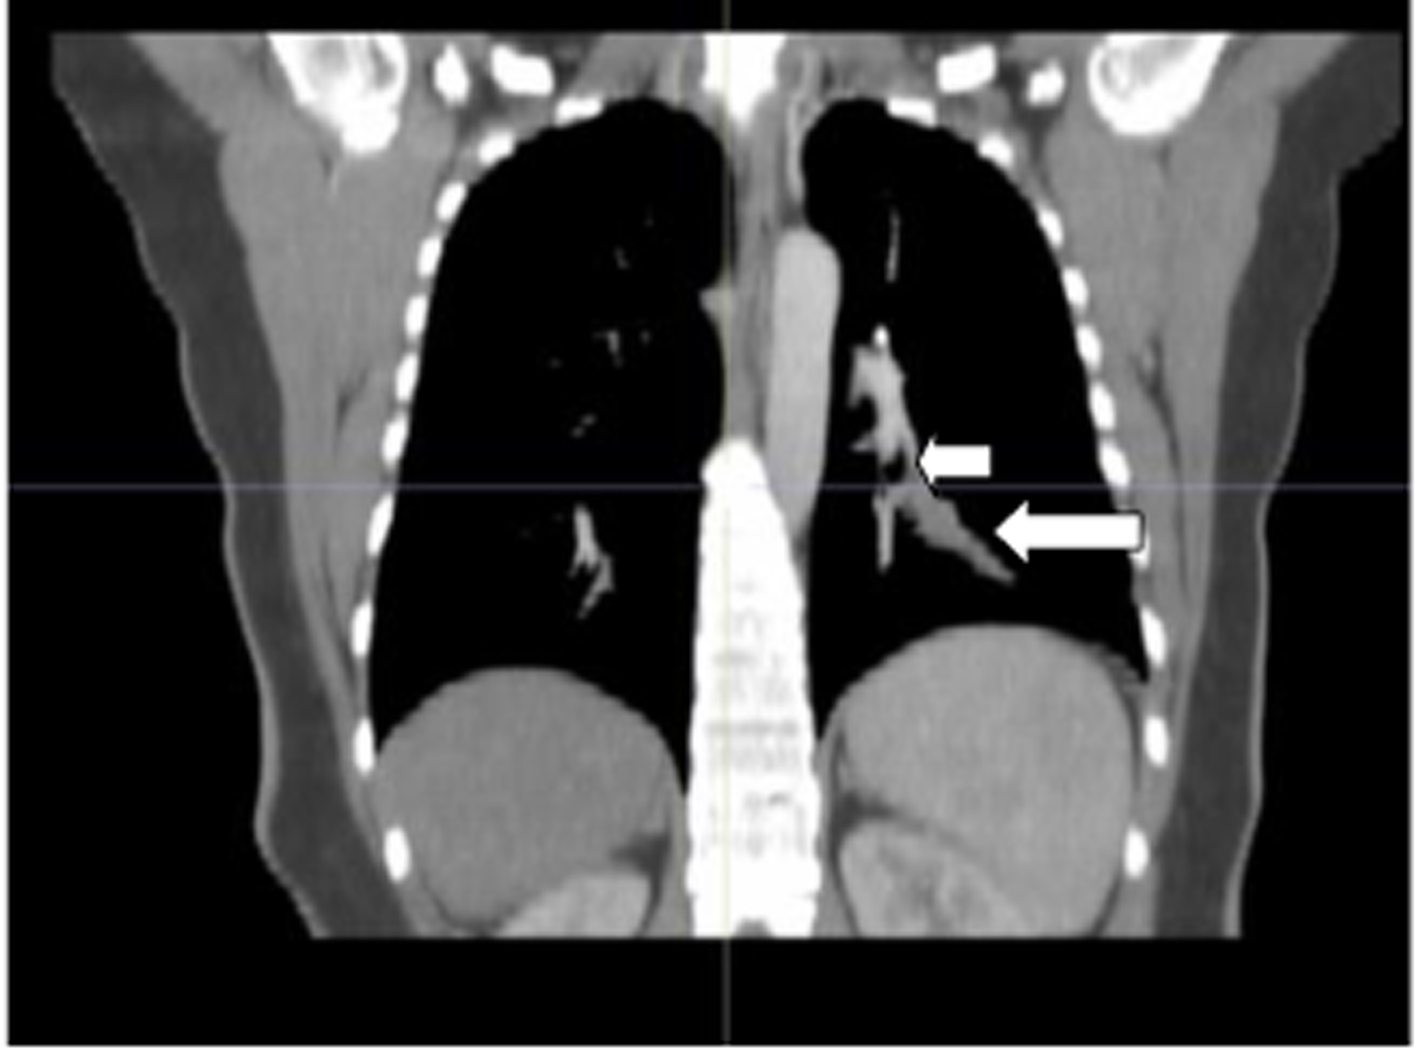
Figure 3. The image with Minimum Intensity Projection technique at coronal mediastinal window of case 1. Short arrow at left: lower bronchial lobe; long arrow: atresic bronchus filled with mucus.
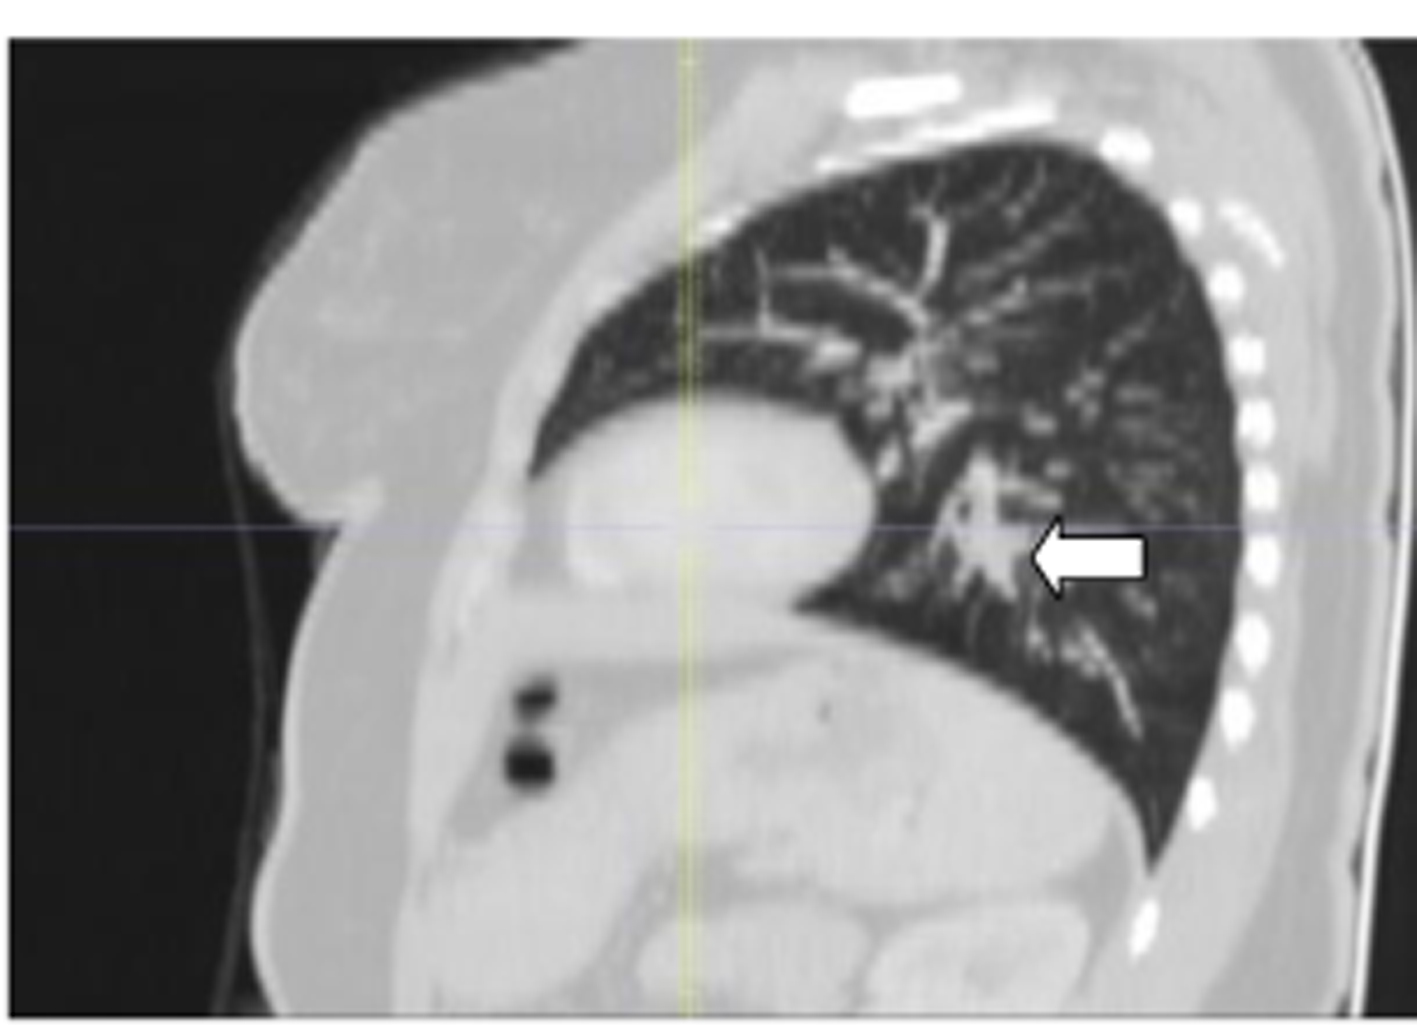
Figure 4. The image with Minimum Intensity Projection technique at sagittal parenchimal window of case 1. The arrow shows the atresic bronchus filled with mucus.
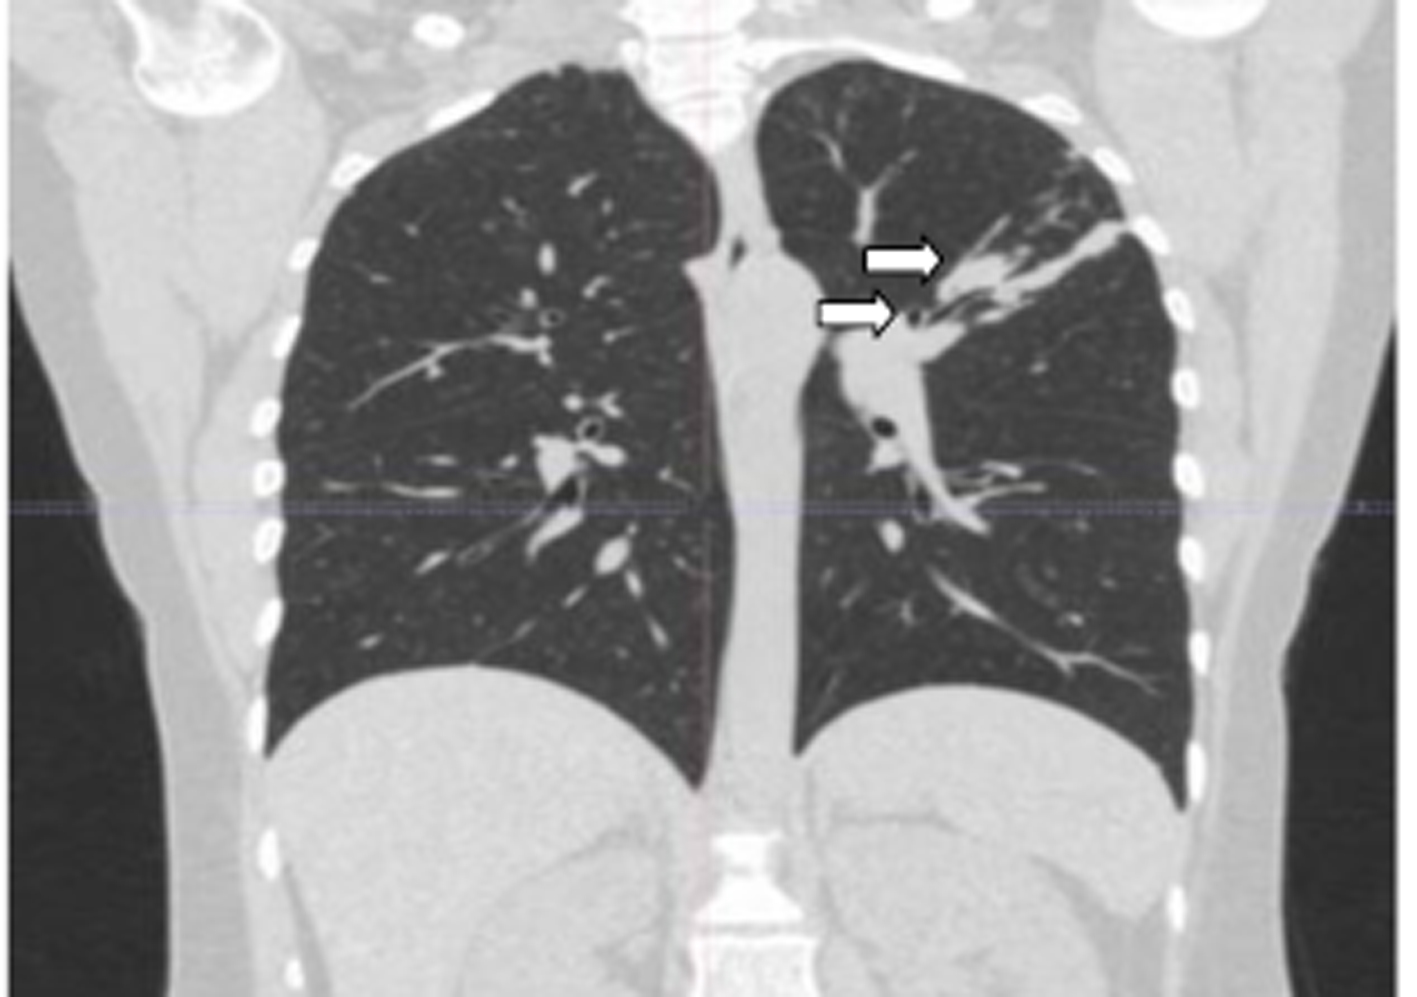
Figure 5. The image with Minimum Intensity Projection technique at coronal parenchimal window of case 2. Left upper arrow: atresic bronchus filled with mucus; left lower arrow: upper apicoposterior segmental bronchus.
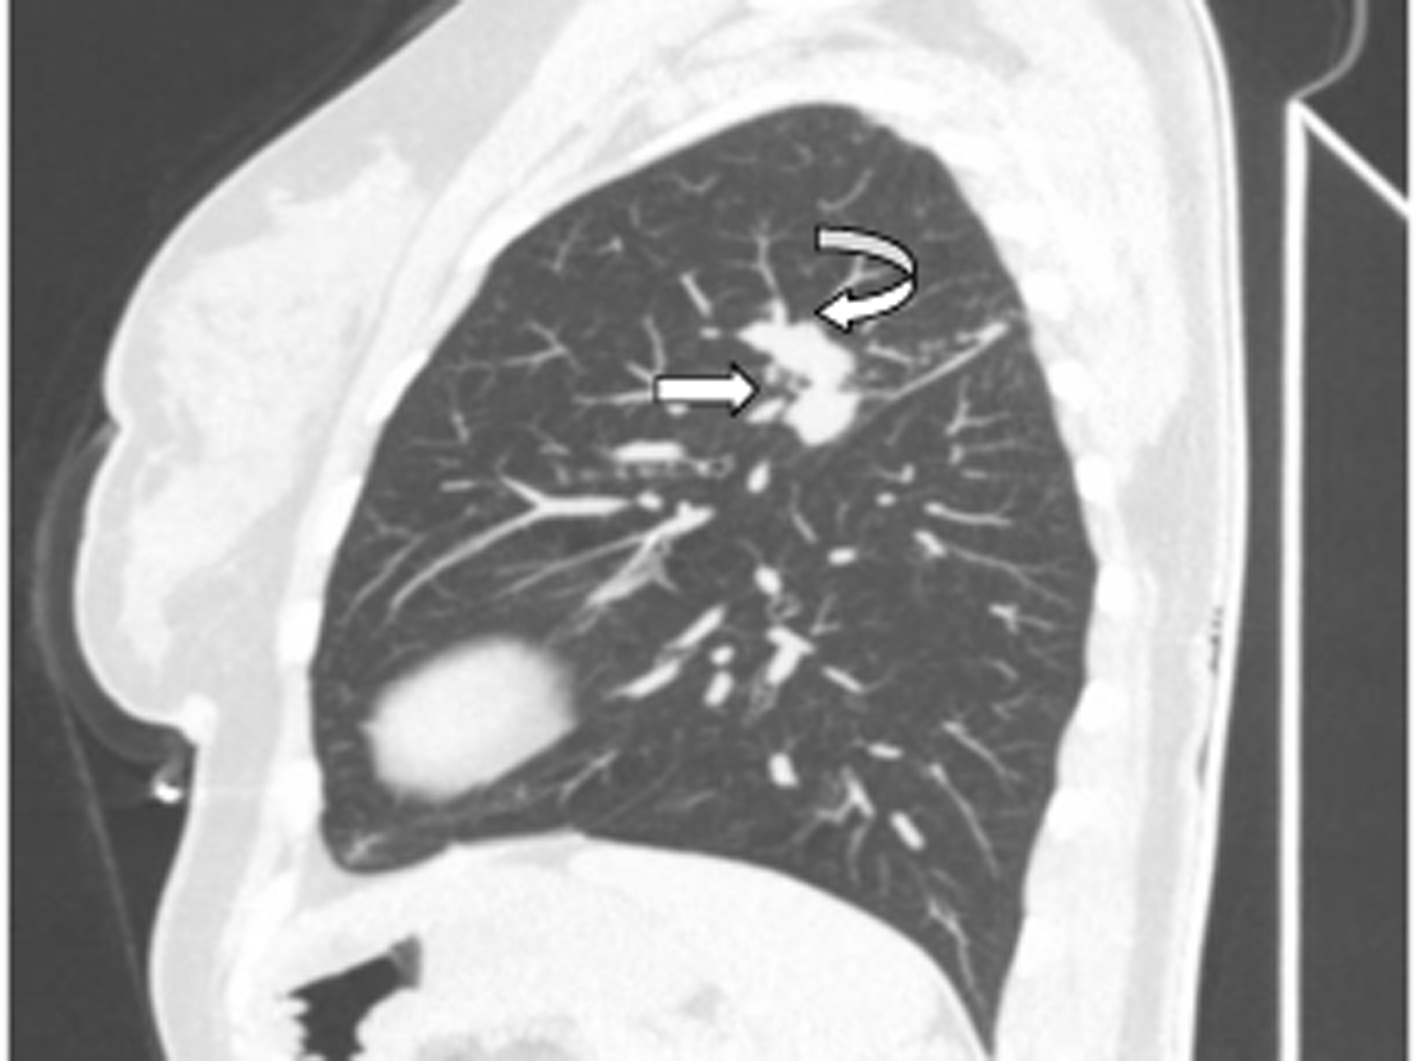
Figure 6. The image with Minimum Intensity Projection technique at sagittal parenchimal window of case 2. Right arrow: the upper bronchus; left arrow: atresic bronchus filled with mucus.
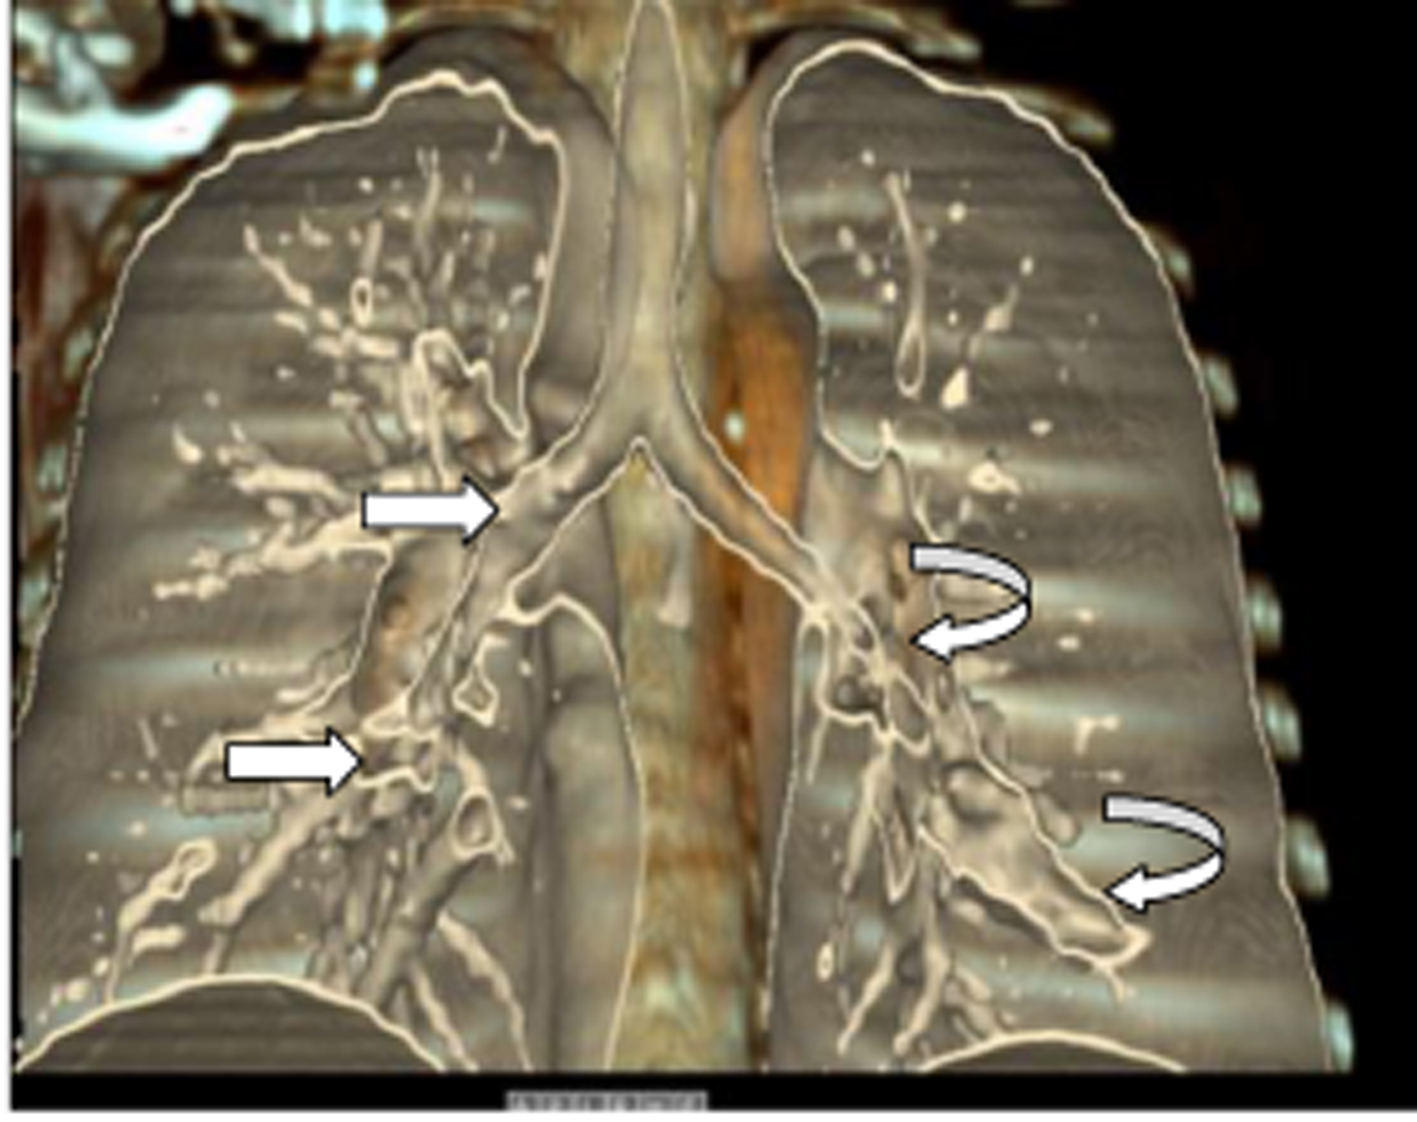
Figure 7. Coronal VR imaging of case 1. Right upper arrow: right main bronchus; right lower arrow: bronchus of lower lobe. Curved left arrows, upper: bronchus of lower lobe; lower: atresic bronchus filled with mucus.
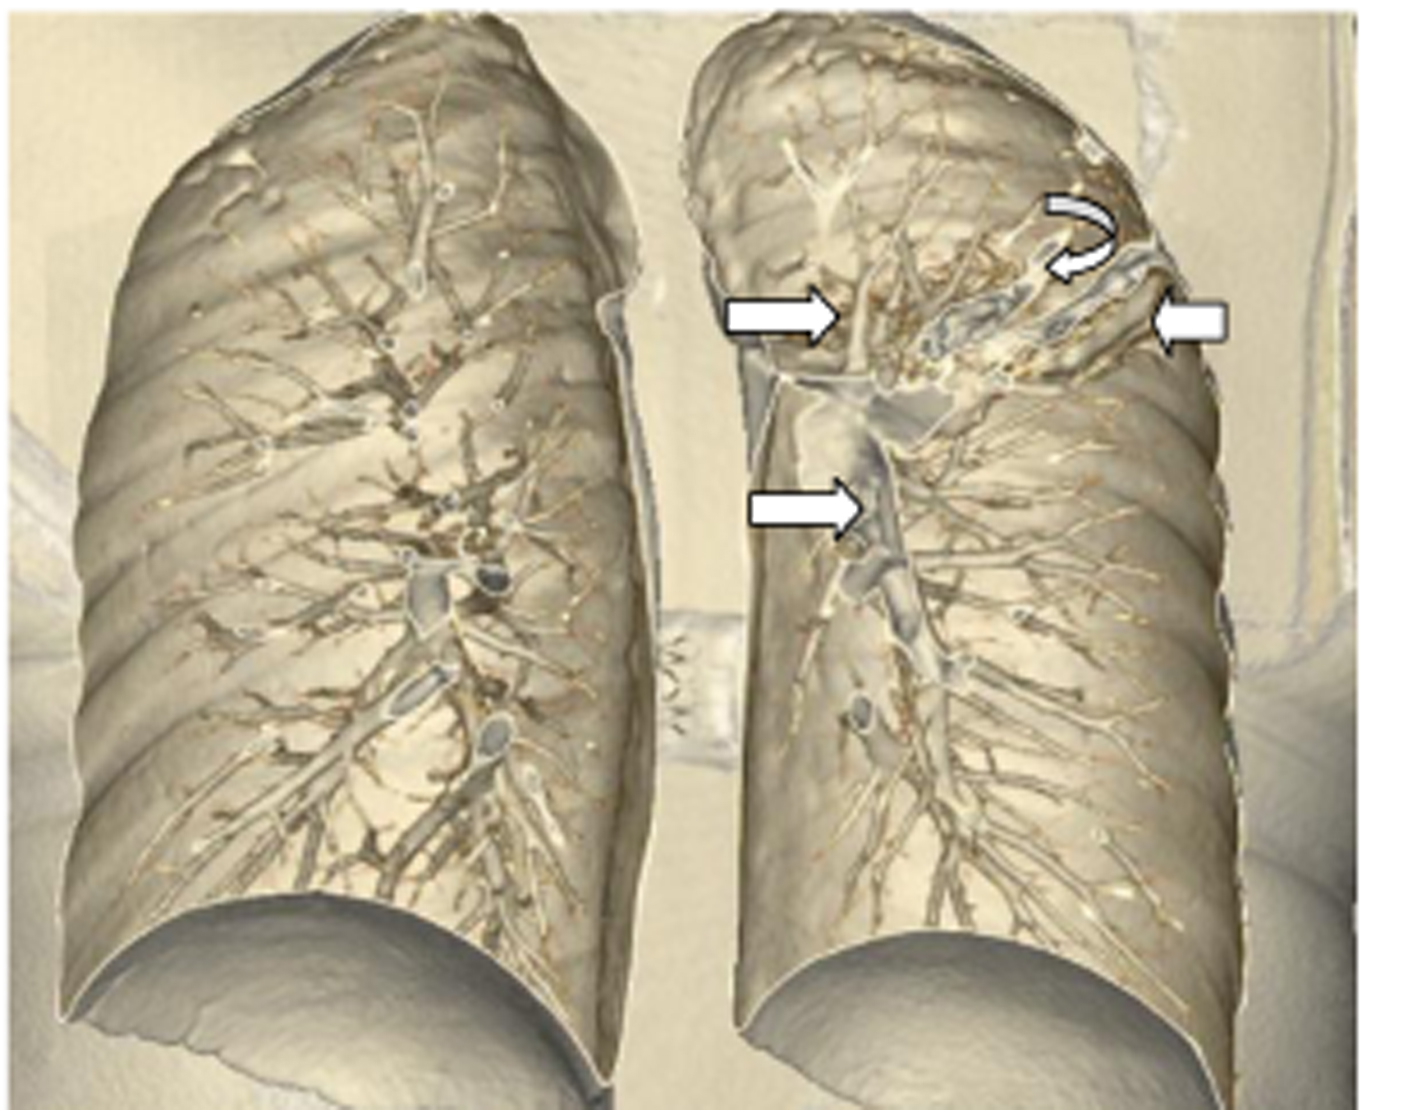
Figure 8. VR image of case 2. Right upper arrow: upper lobe bronchus; right lower arrow: lower lobe bronchus. Left upper arrow: atresic bronchus filled with mucus; left lower arrow: infiltration limited with major fissura.